

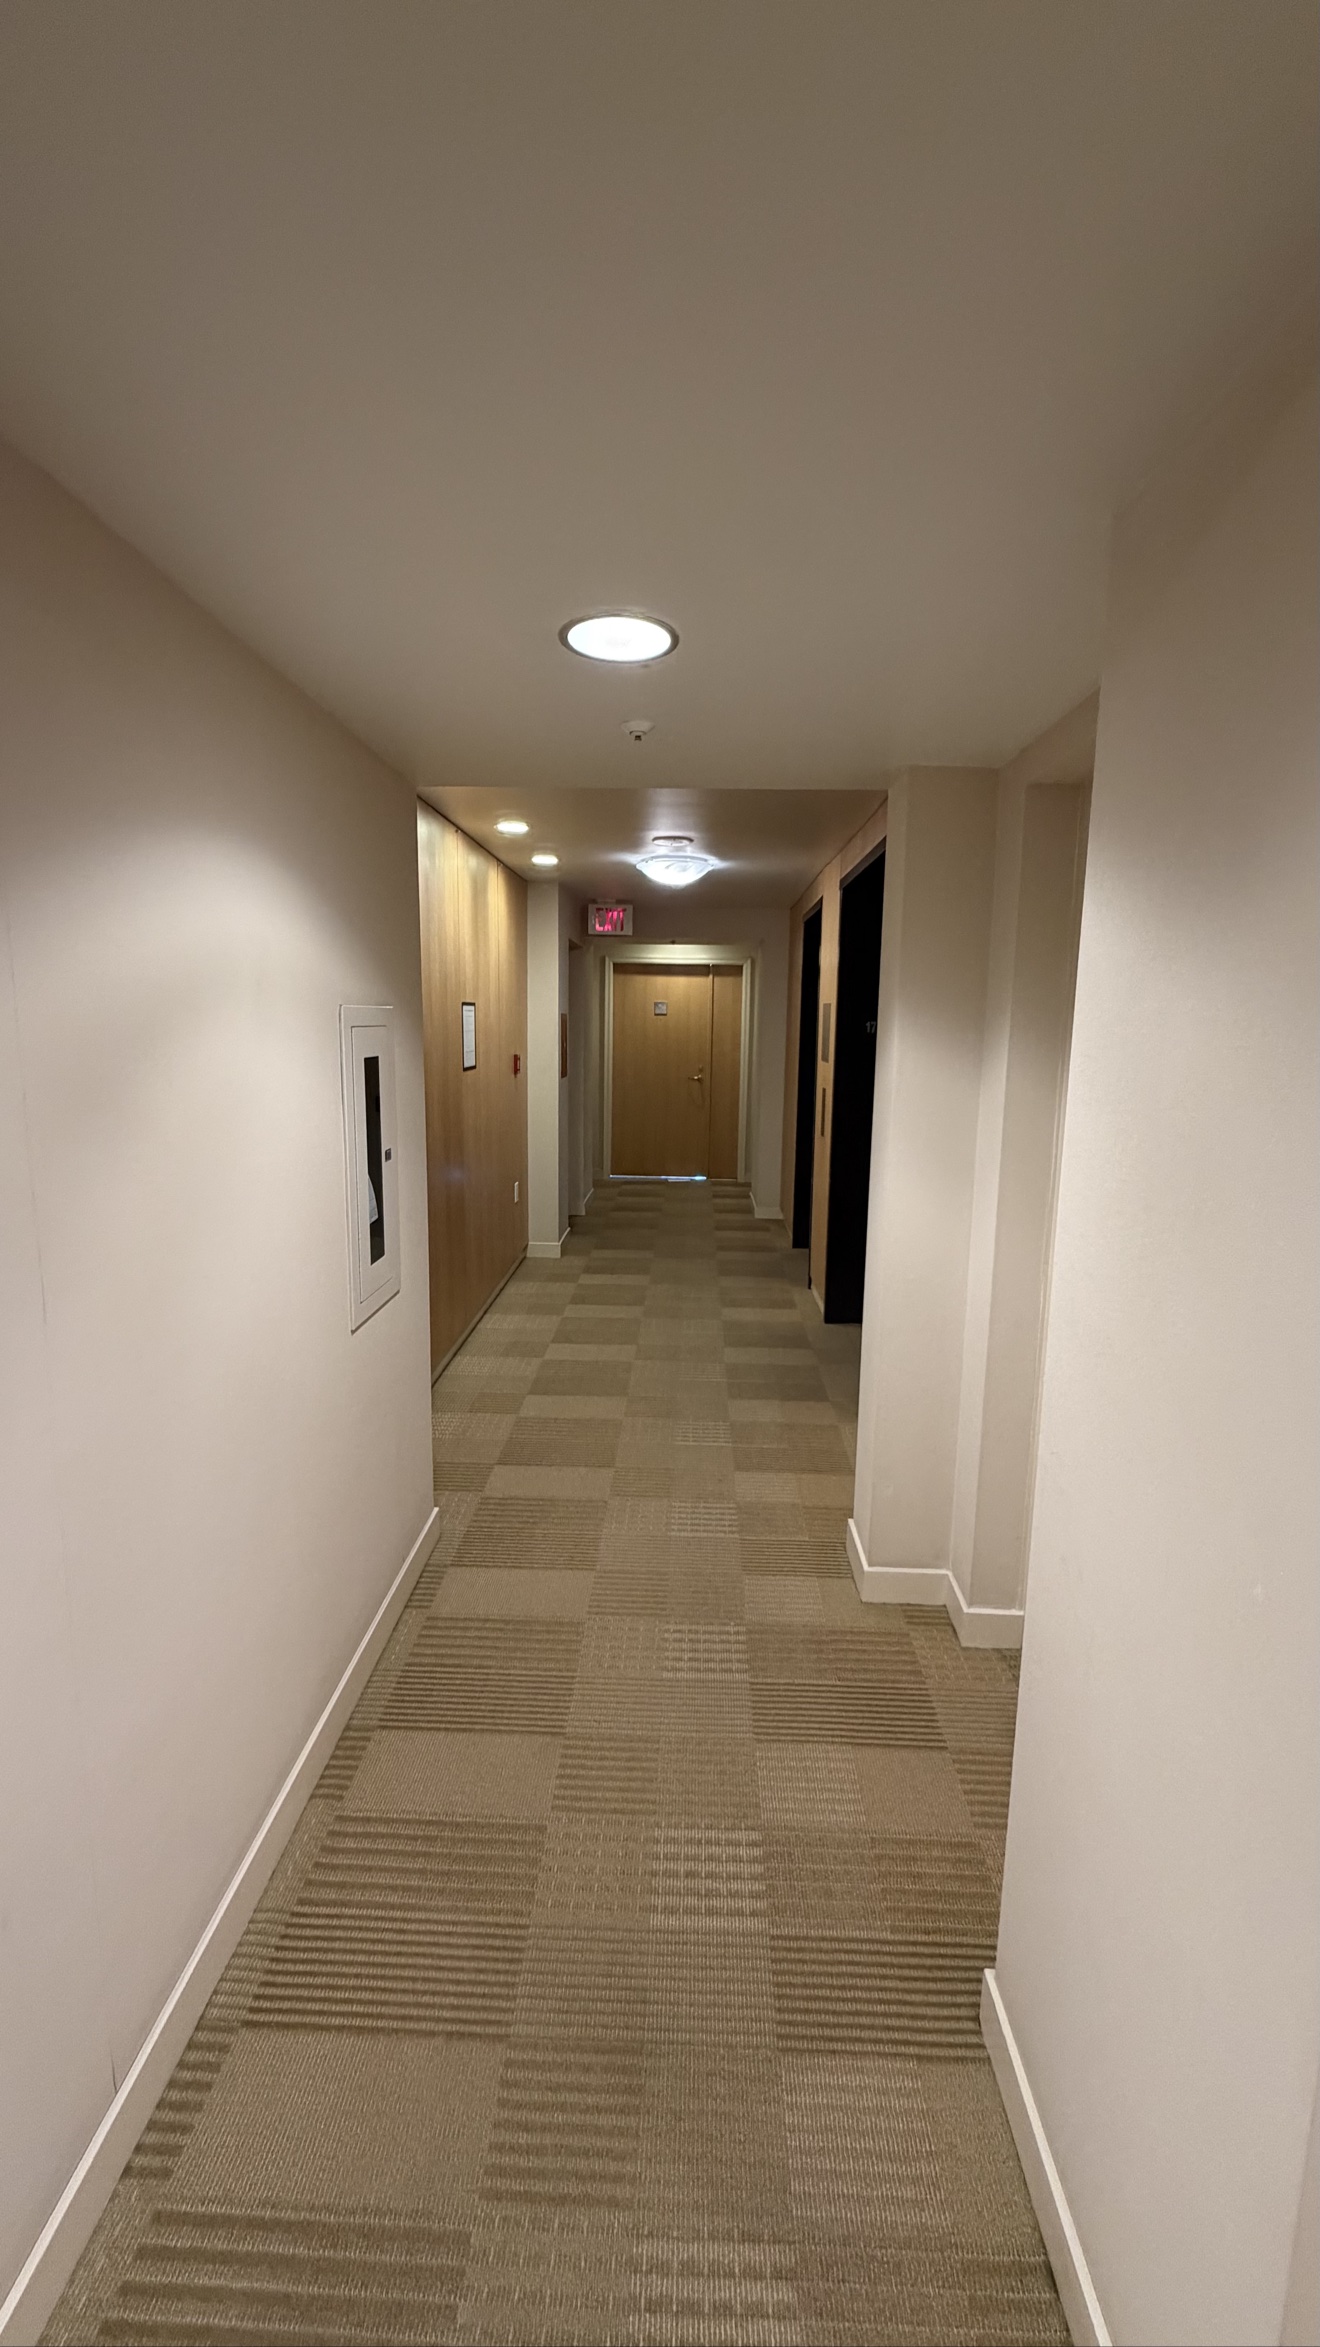
An inside look at one of our most challenging commercial wallpaper removal and drywall restoration projects in Vancouver, BC.
Project Location: Bayshore, Vancouver, BC
Project Type: Commercial & High-Rise Renovation
Project Scope: 36,000 sq ft of walls, 320 unit doors, 80 elevator doors and 10,000 sq ft of ceilings across 40 floors
Services: Wallpaper Removal, Drywall Restoration, Surface Preparation, Skim Coating, Sanding & Priming
Contractor: Exceptional Painting Inc.
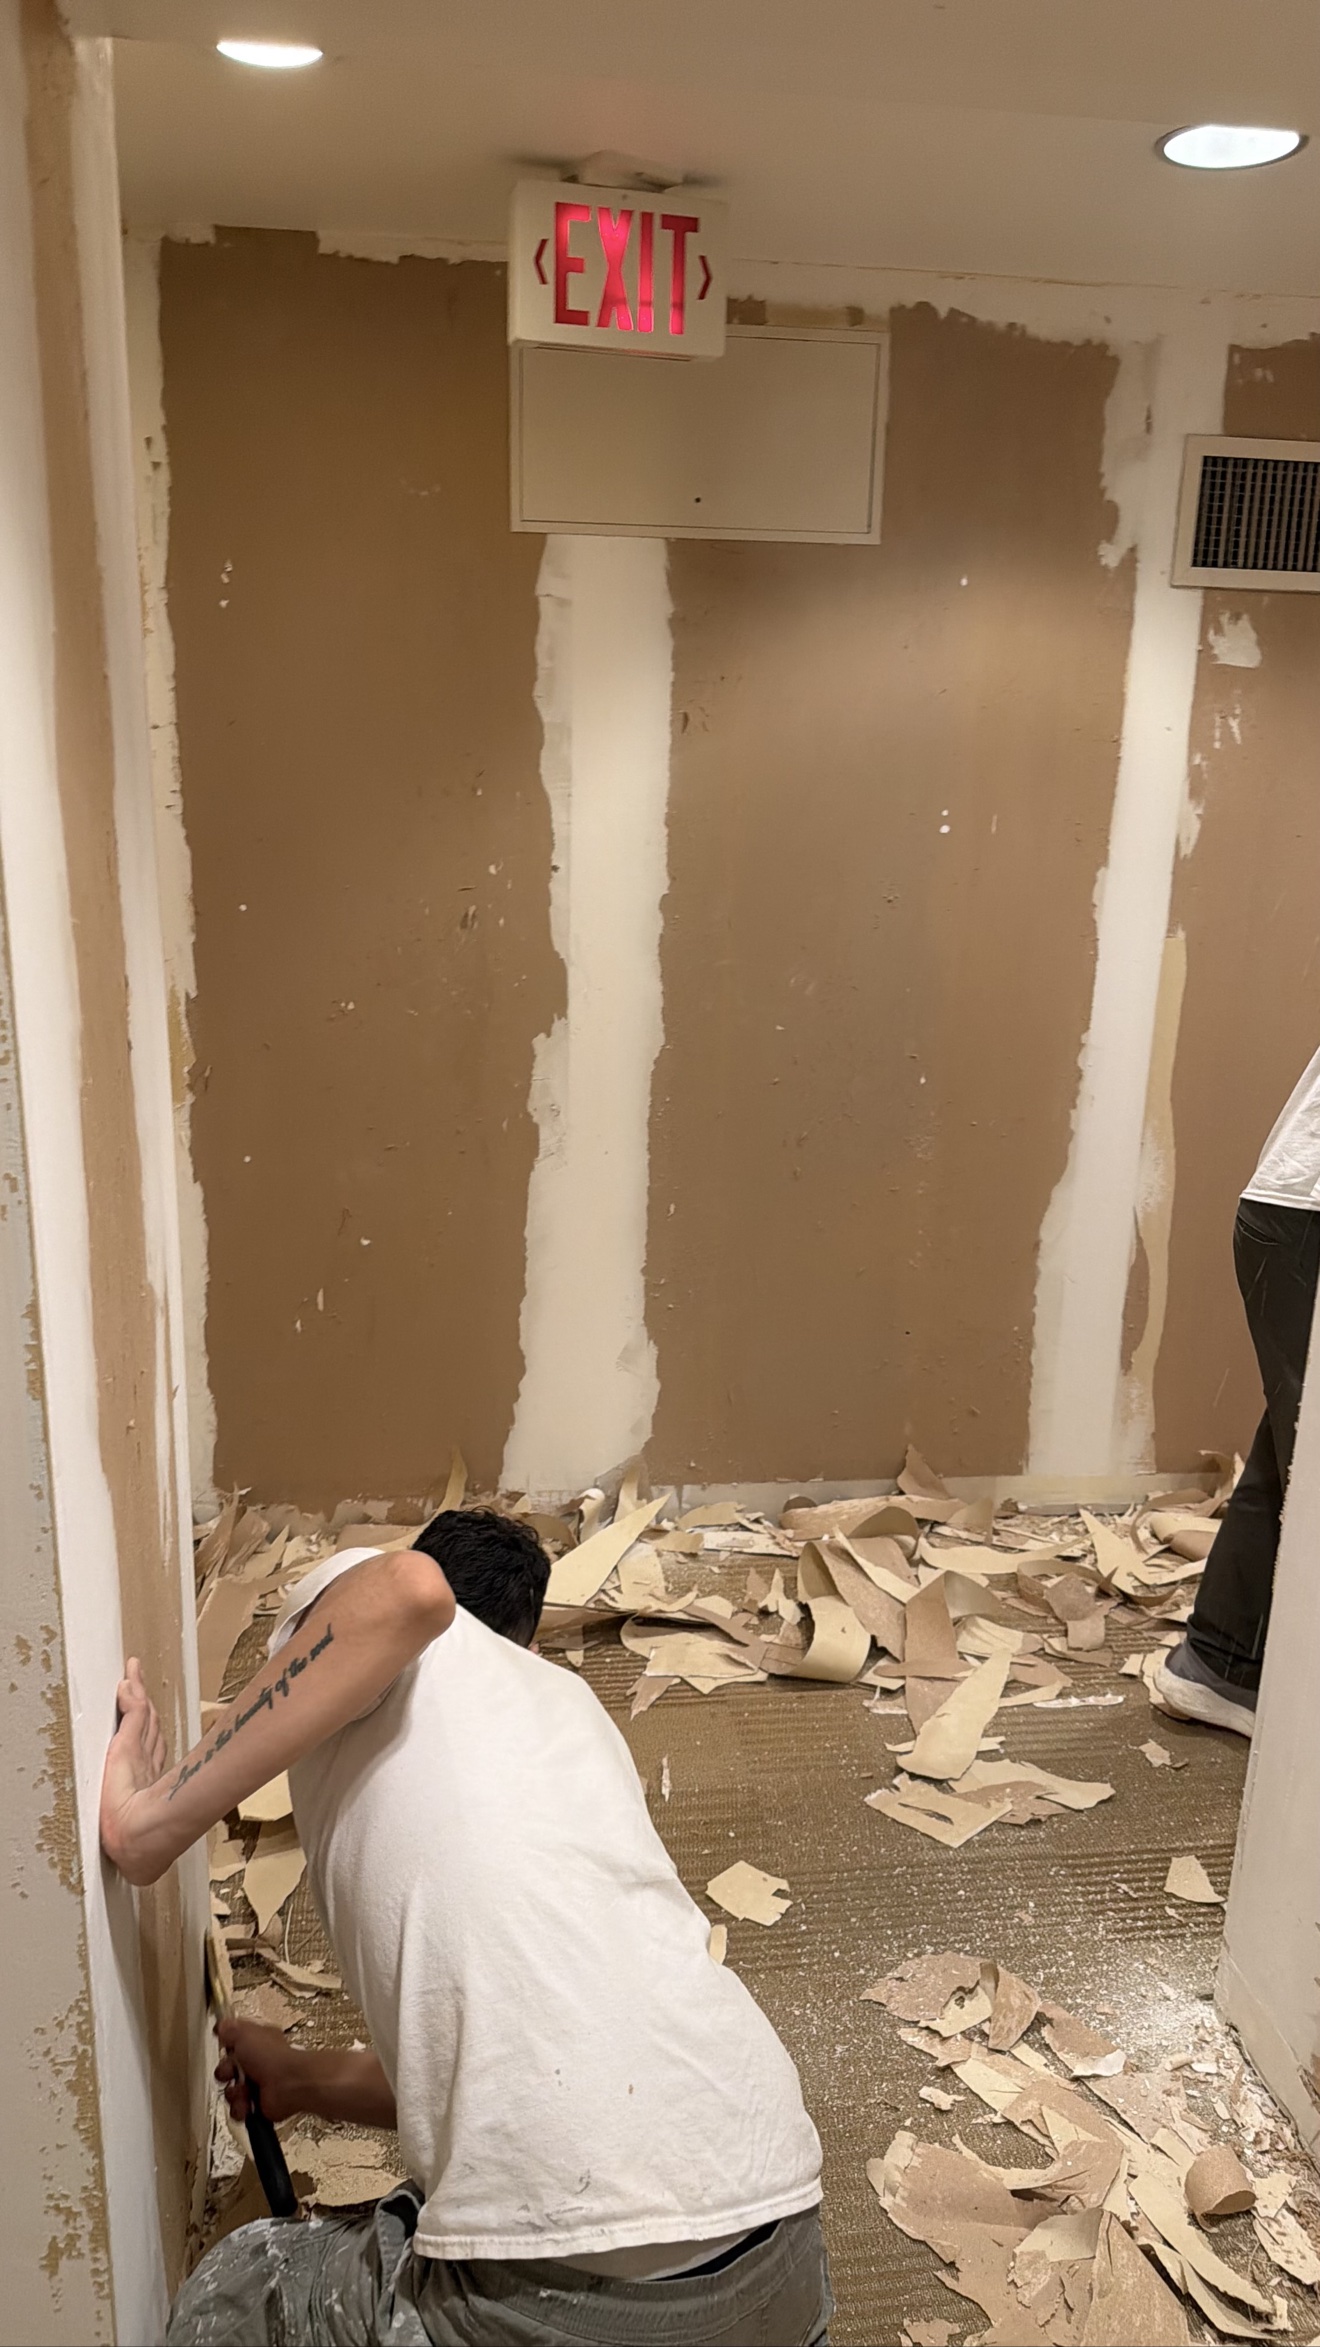
When a Straightforward Renovation Becomes a Major Challenge
Every experienced contractor knows that renovation projects can reveal unexpected problems. Sometimes, even the most carefully planned work takes a completely different direction once the existing materials are removed.
At Exceptional Painting Inc., we experienced exactly that during a major renovation project at Bayshore in Vancouver.
Our team was responsible for preparing surfaces across 40 floors, including walls, unit doors, elevator doors and ceilings.
The original plan seemed straightforward: remove the old wallpaper, prepare the drywall, complete minor repairs and skim coating where necessary, and leave the walls smooth, primed, and ready for new wallpaper installation.
However, what we discovered beneath the existing wallpaper turned this project into one of the most technically demanding surface preparation jobs our team had ever encountered.
What followed was a lengthy process of testing, troubleshooting, and developing a reliable solution to a problem that conventional drywall preparation methods simply couldn’t resolve.
The Original Scope of Work
When we initially estimated the project, our approach was based on a standard commercial wallpaper removal and wall preparation process.
The scope included:
- Removing the existing wallpaper throughout the designated areas.
- Sanding the wall surfaces and removing remaining adhesive.
- Applying a suitable primer to seal and stabilize the drywall.
- Completing minor drywall repairs and patching.
- Skim coating approximately 50% of the wall surfaces where necessary.
- Sanding the repaired surfaces to achieve a smooth finish.
- Applying a final primer coat.
- Preparing all surfaces for professional wallpaper installation.
Based on the information available during the estimating stage, this was a reasonable and practical plan.
Unfortunately, the condition of the drywall beneath the wallpaper was far more complicated than anyone anticipated.
The First Problem: Hundreds of Bubbles Appearing During Skim Coating
After removing the wallpaper, our team began preparing the exposed drywall.
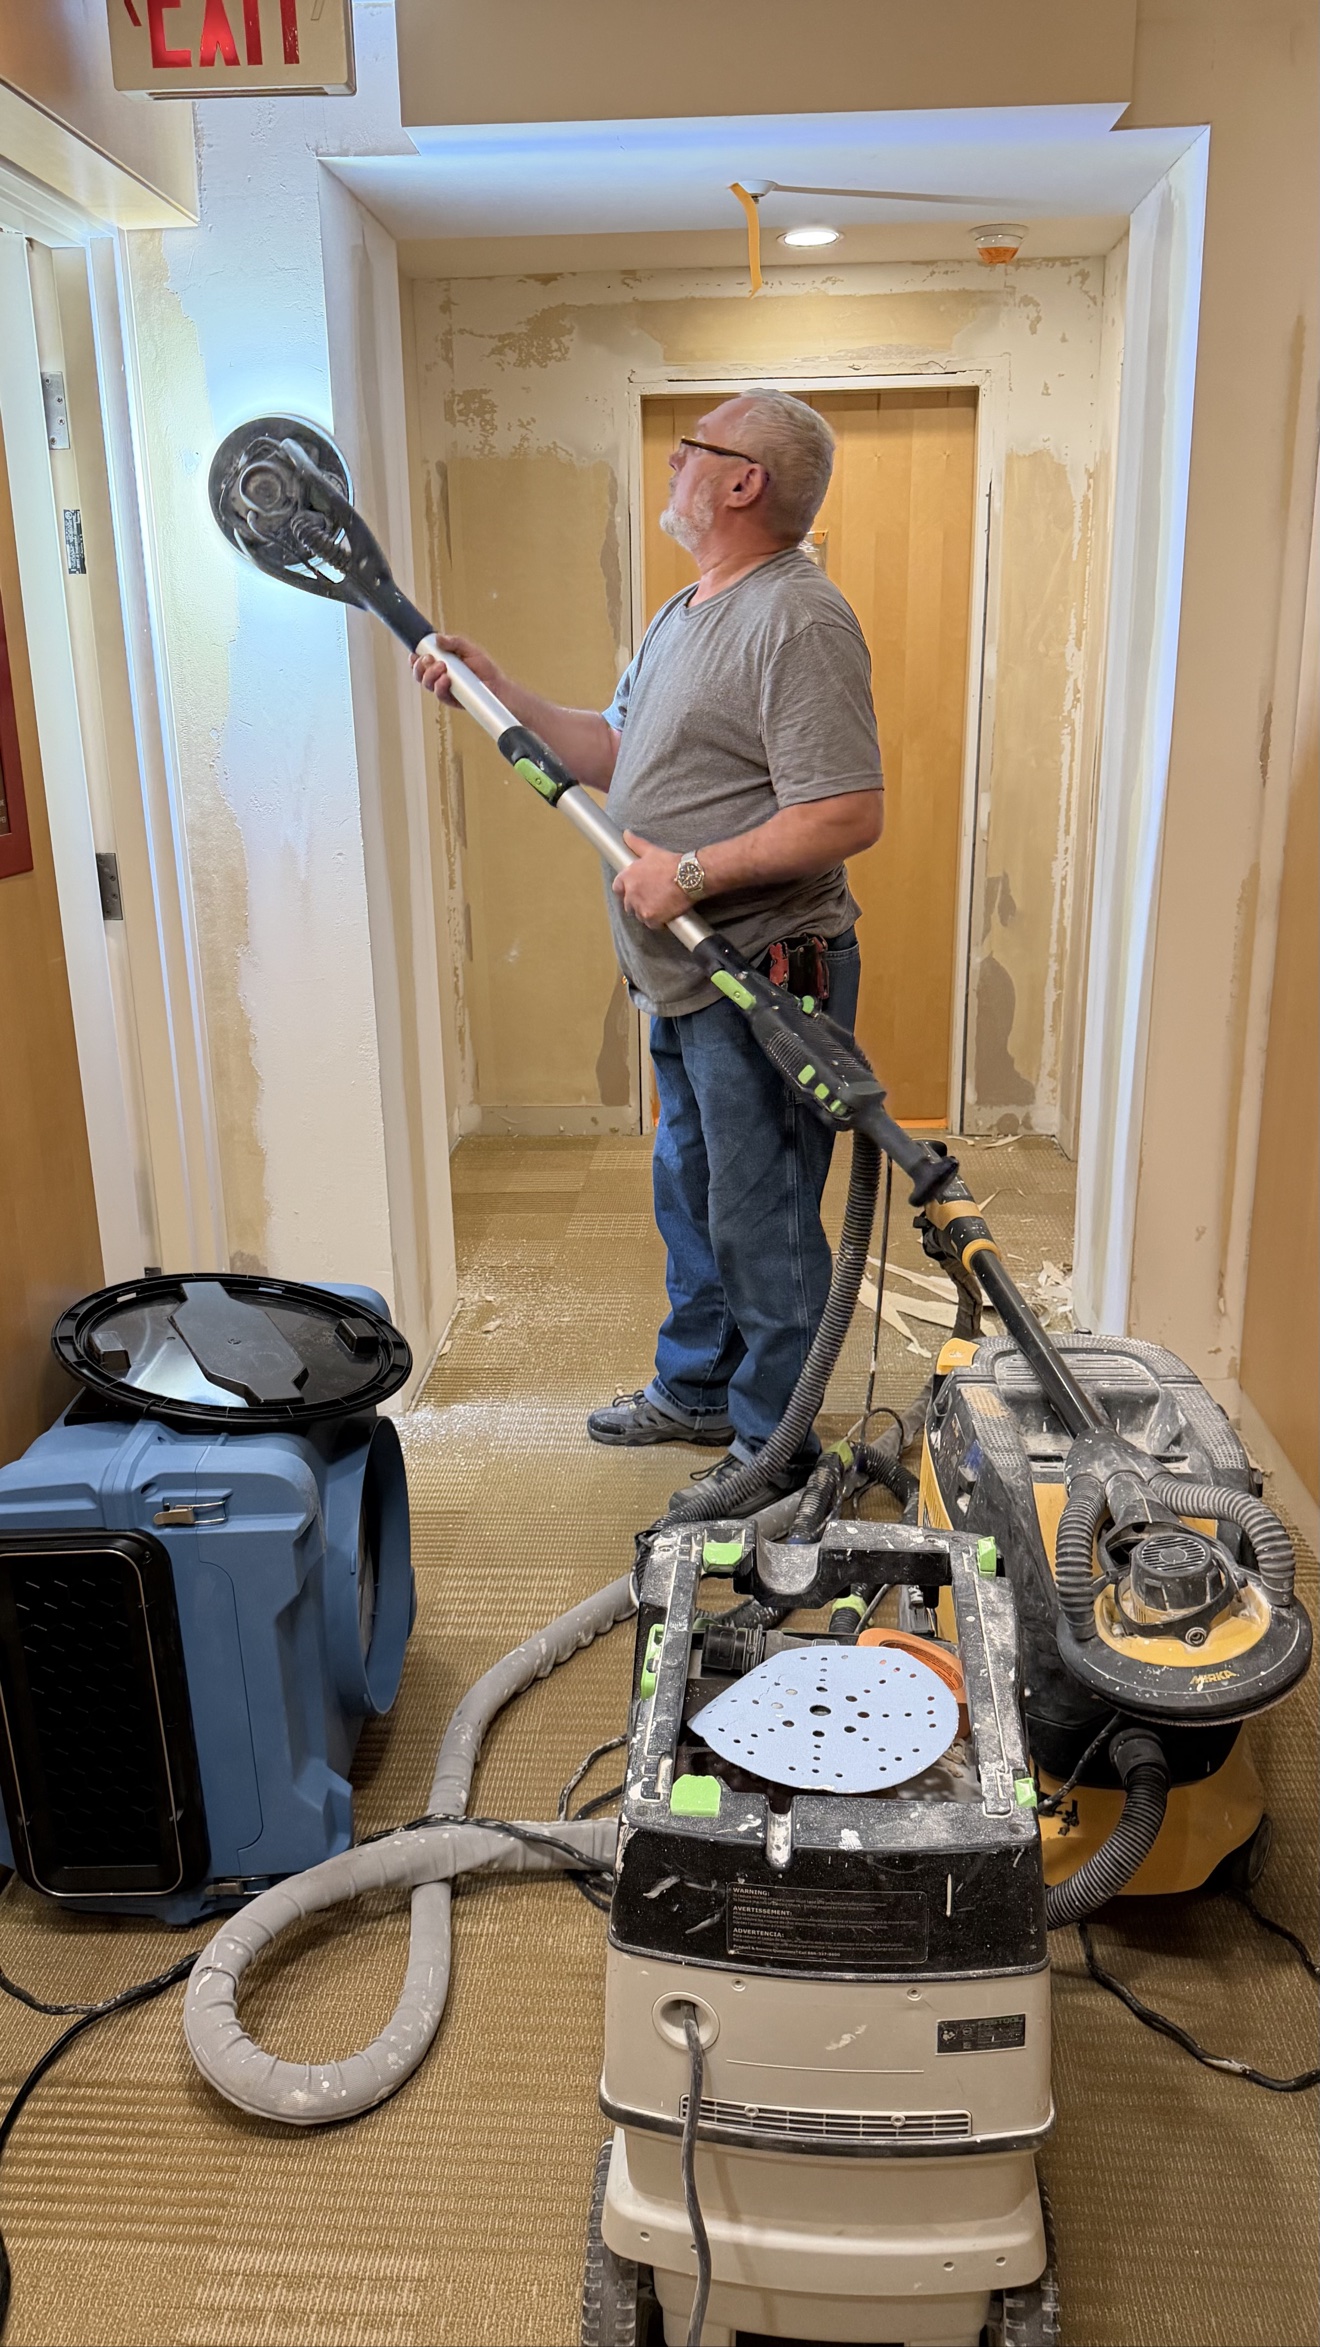
We used professional Festool sanding equipment with dust-extraction systems, working with 60-grit and 320-grit abrasives during different stages of preparation to remove residue and smooth the surfaces.
Following sanding, we applied Roman PRO-999 Rx-35 primer, which had been recommended for problematic wallpaper-related surfaces.
We were advised that the primer would help isolate the drywall paper and reduce the possibility of bubbling when joint compound was applied.
We allowed the primer to dry for a full 48 hours before beginning skim coating.
Everything appeared ready.
But as soon as our team started applying joint compound, the problems began.
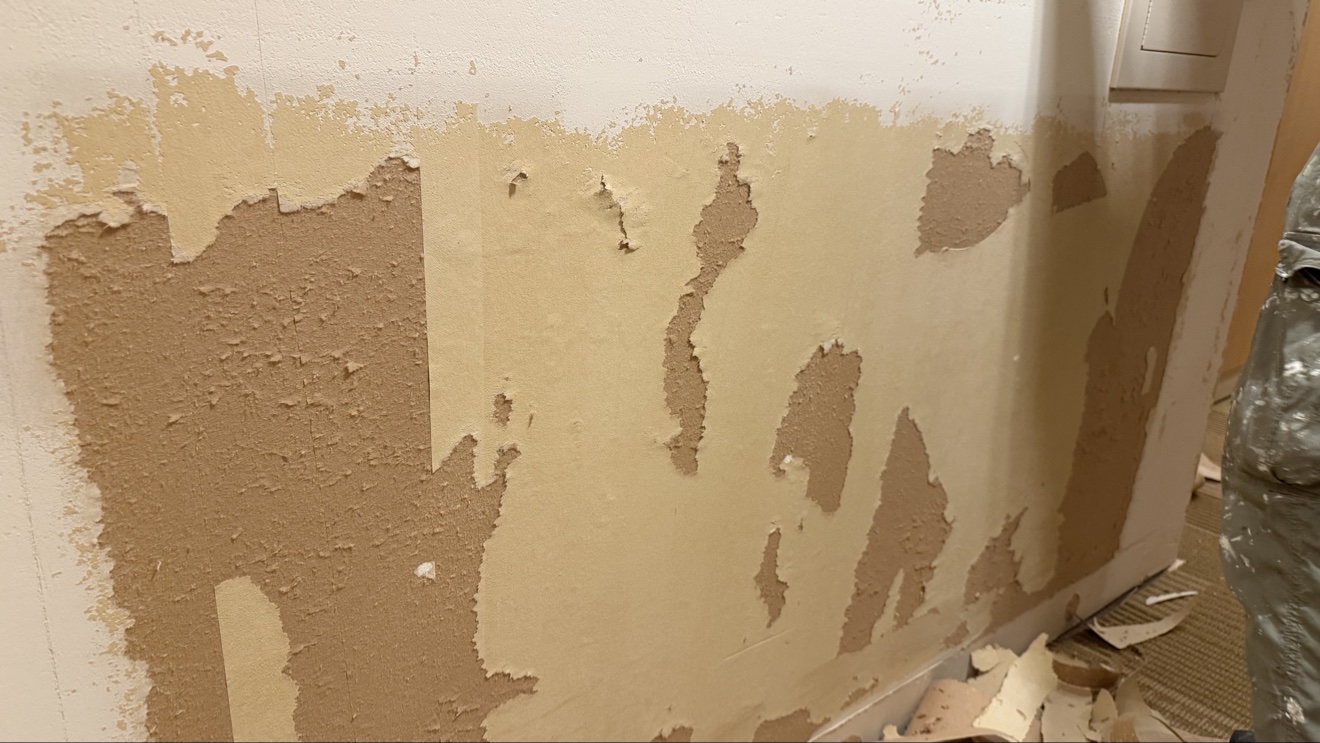
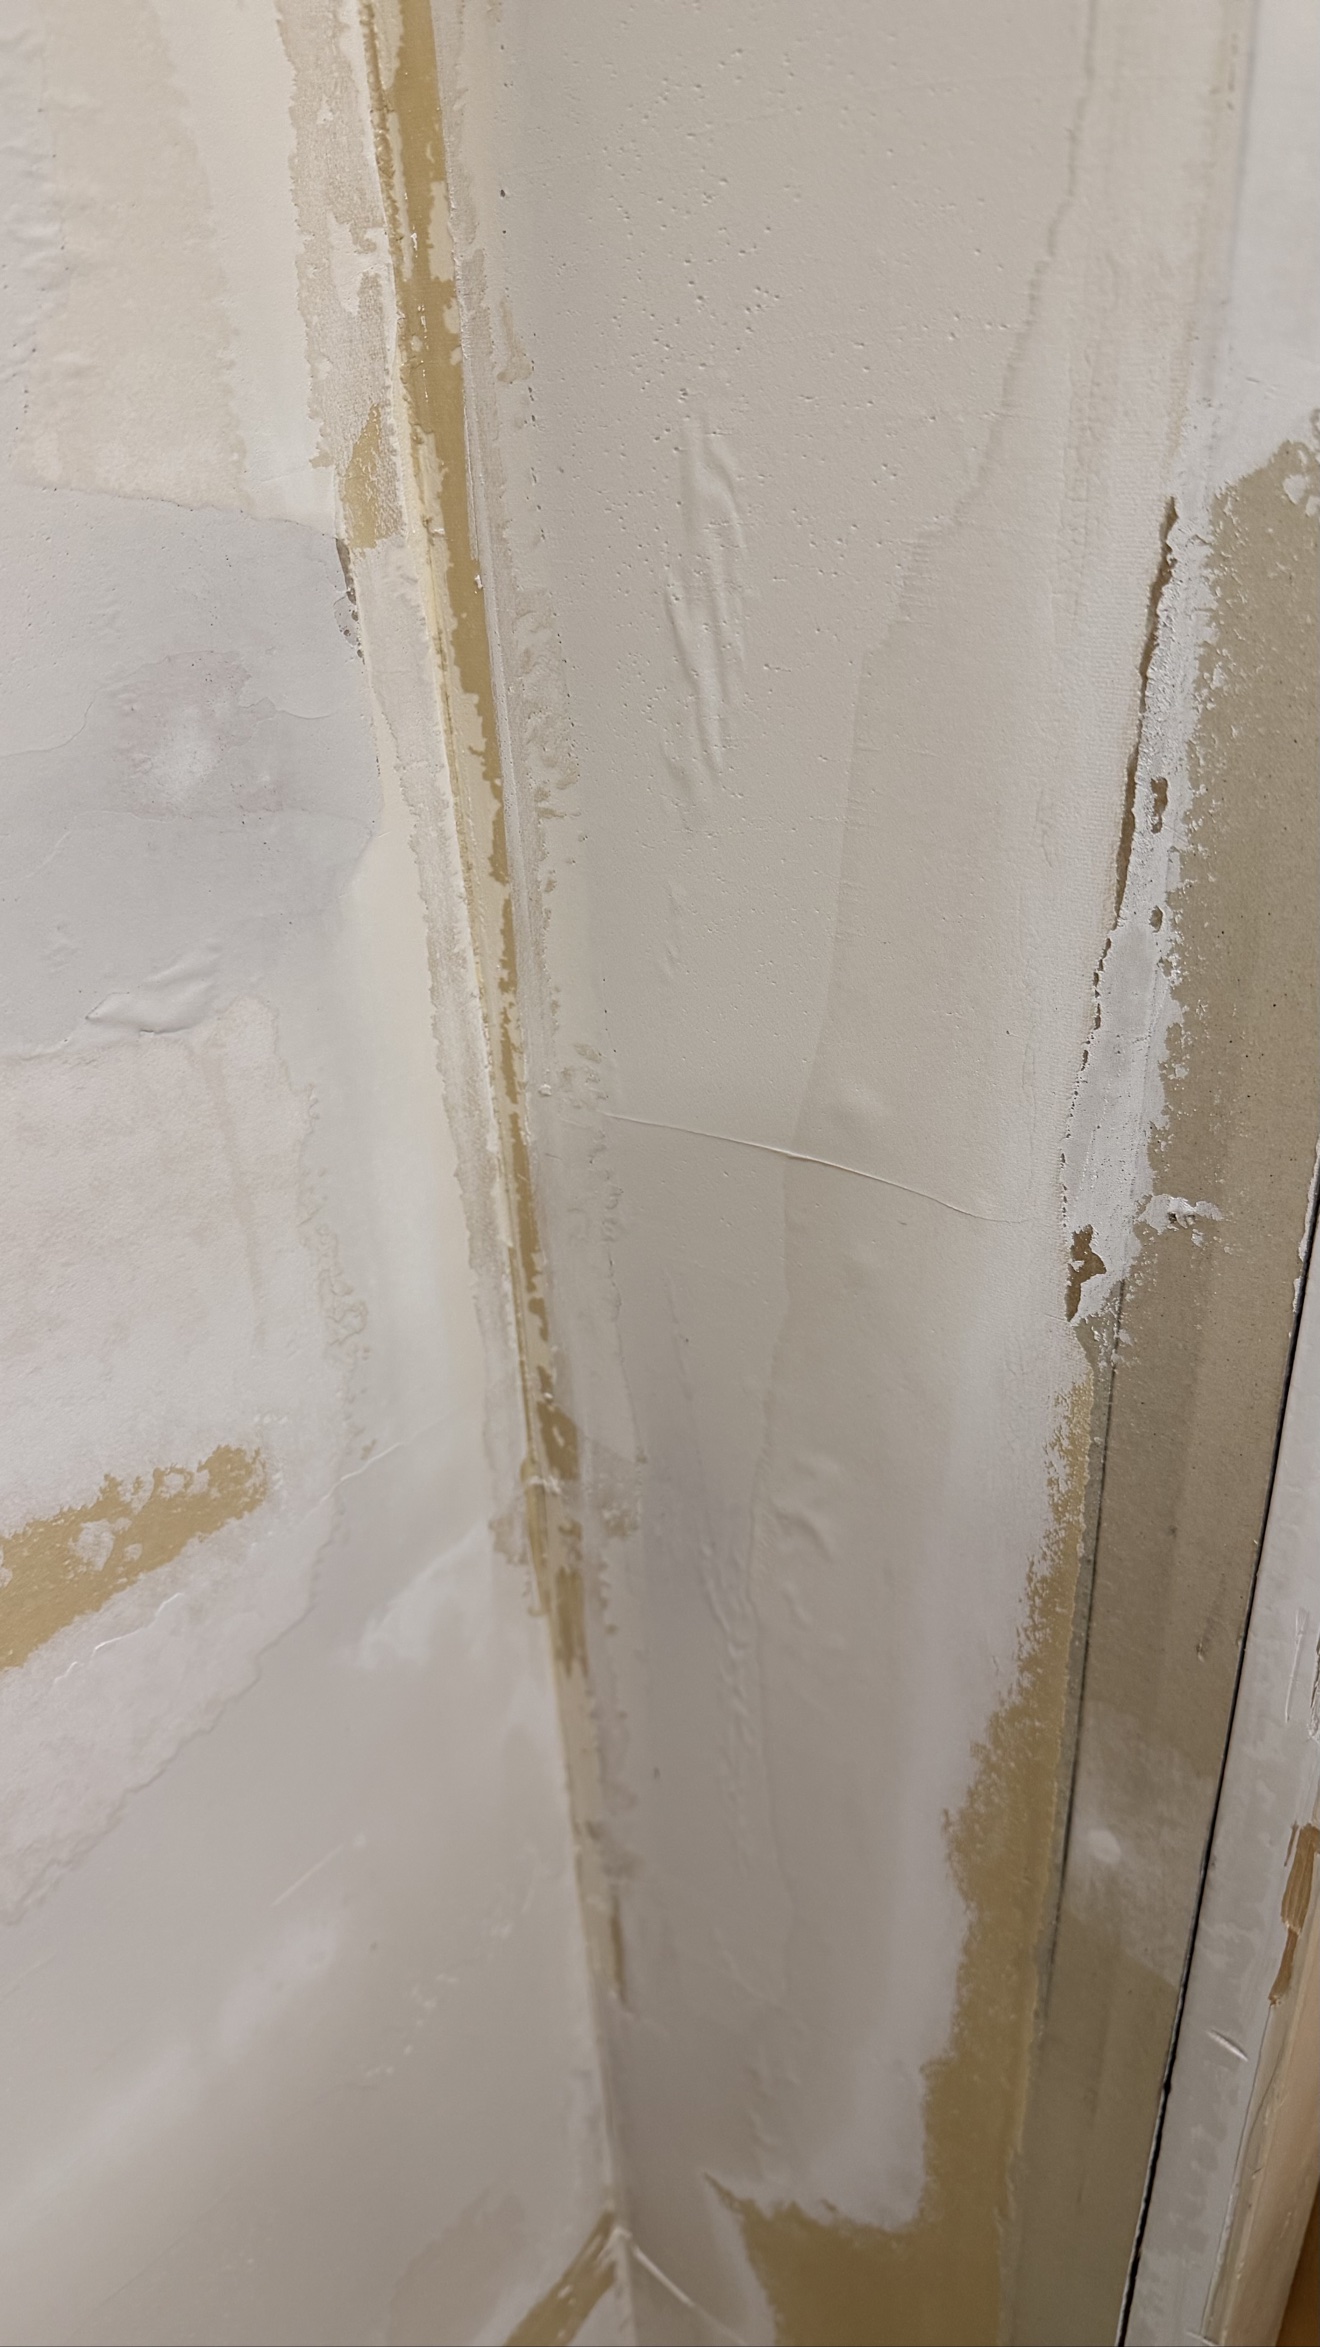
The existing drywall paper reacted to the moisture in the compound, creating an extraordinary number of bubbles beneath the surface.
In some areas, just 10 square feet of wall surface developed approximately 200 to 300 bubbles.
This wasn’t a minor cosmetic issue.
The bubbles were appearing across entire sections of wall, and the more compound we applied, the more bubbles developed.
Even after the skim coat dried, many of the bubbles remained trapped beneath the surface.
The walls were nowhere near the smooth, stable condition required for new wallpaper installation.
Why Cutting Out Individual Bubbles Wasn’t an Option
Our first step was to seek technical guidance.
We contacted the wallpaper-related product specialists, explained the situation, and asked how to proceed.
One recommendation was to cut out the affected bubbles and repair those areas individually.
For isolated drywall bubbles, that approach can sometimes be effective.
But this was not an isolated problem.
We were dealing with hundreds of bubbles within small sections of wall, repeated across a massive high-rise renovation.
Every time we repaired one area and applied more joint compound, additional bubbles could appear.
At that scale, cutting out individual bubbles was simply not a realistic or reliable solution.
We needed a method that could be consistently applied across thousands of square feet of affected surfaces.
Testing Five Different Primers: Why None of Them Worked
Before changing our entire preparation process, we decided to test several primers to determine whether the drywall paper could be successfully sealed and stabilized.
Our team tested five different products:
- Roman PRO-999 Rx-35
- Roman ECO-988
- Sherwin-Williams Extreme Block
- Benjamin Moore Aqua Lock
- Zinsser Peel Stop
These products were tested in an effort to isolate the compromised drywall paper and prevent bubbling during subsequent skim-coating applications.
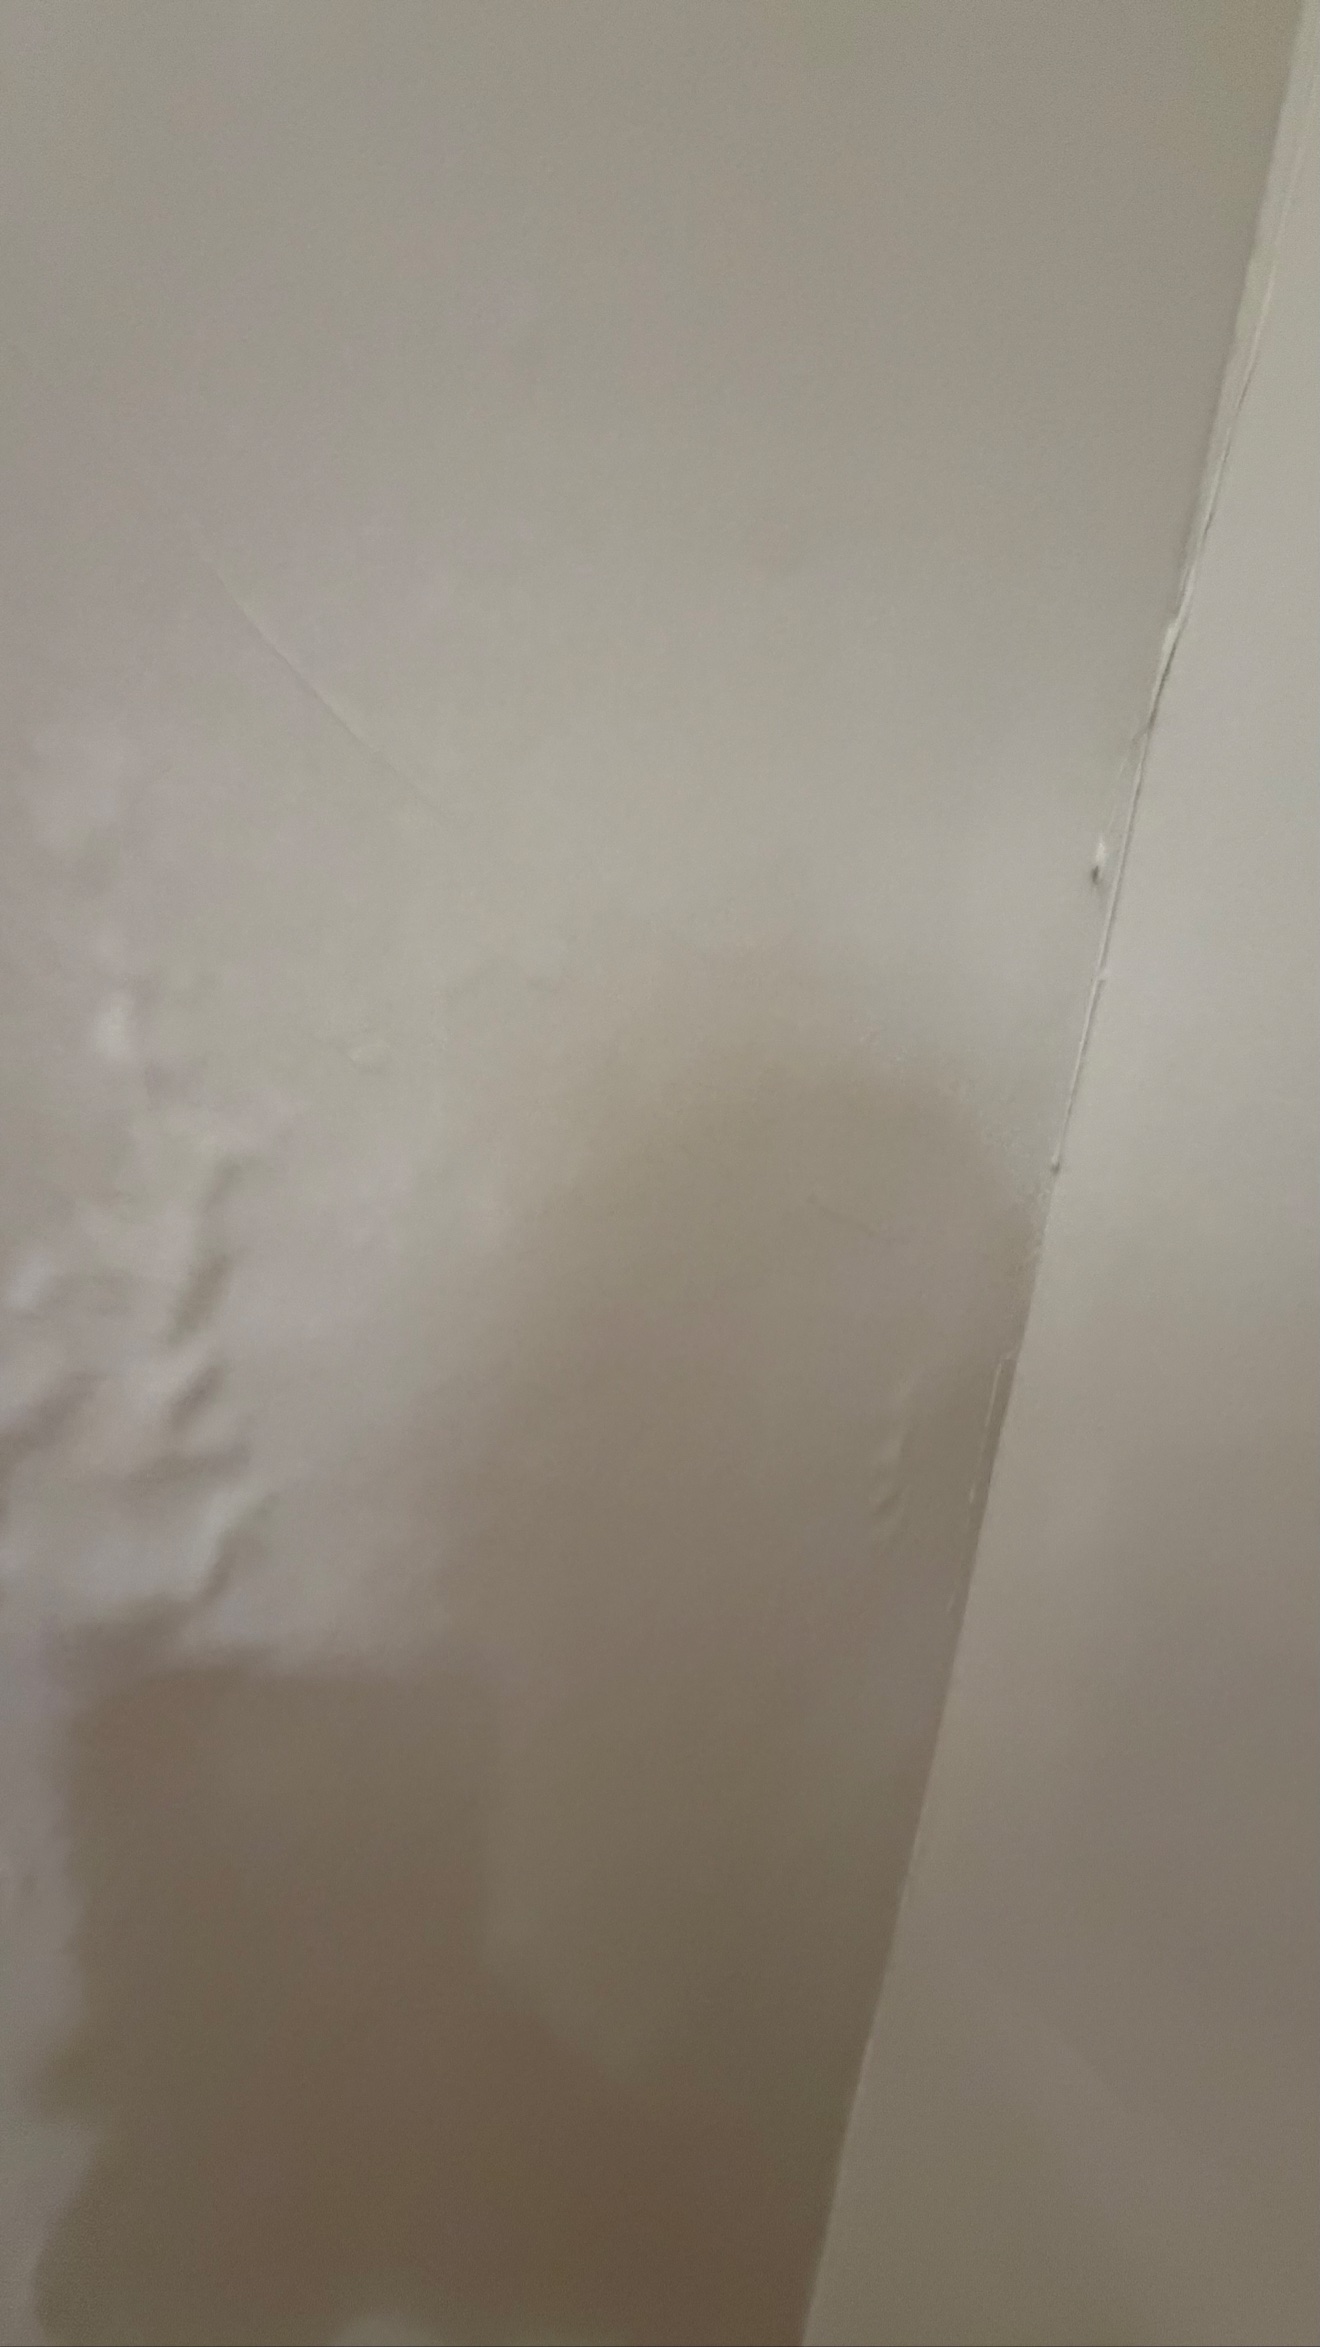
Unfortunately, none of the five primers successfully resolved the issue under the conditions present on our project.
The drywall paper continued reacting when joint compound was applied.
Sherwin-Williams Extreme Block introduced an additional complication. Its strong odour generated complaints from building occupants, despite our use of professional air-filtration systems.
We had now invested considerable time in preparation, product testing, and troubleshooting, yet the same problem continued.
It became increasingly clear that changing primers alone would not solve the underlying issue.
This did not mean the products themselves were defective or unsuitable for their intended applications.
Rather, the existing drywall substrate was in such a compromised condition that the systems we tested were unable to deliver the results required for this particular project.
We needed to approach the problem differently.
Solution One: Removing the Damaged Drywall Paper Almost Down to the Gypsum Core
After exhausting our initial priming options, we began investigating the drywall surface itself.
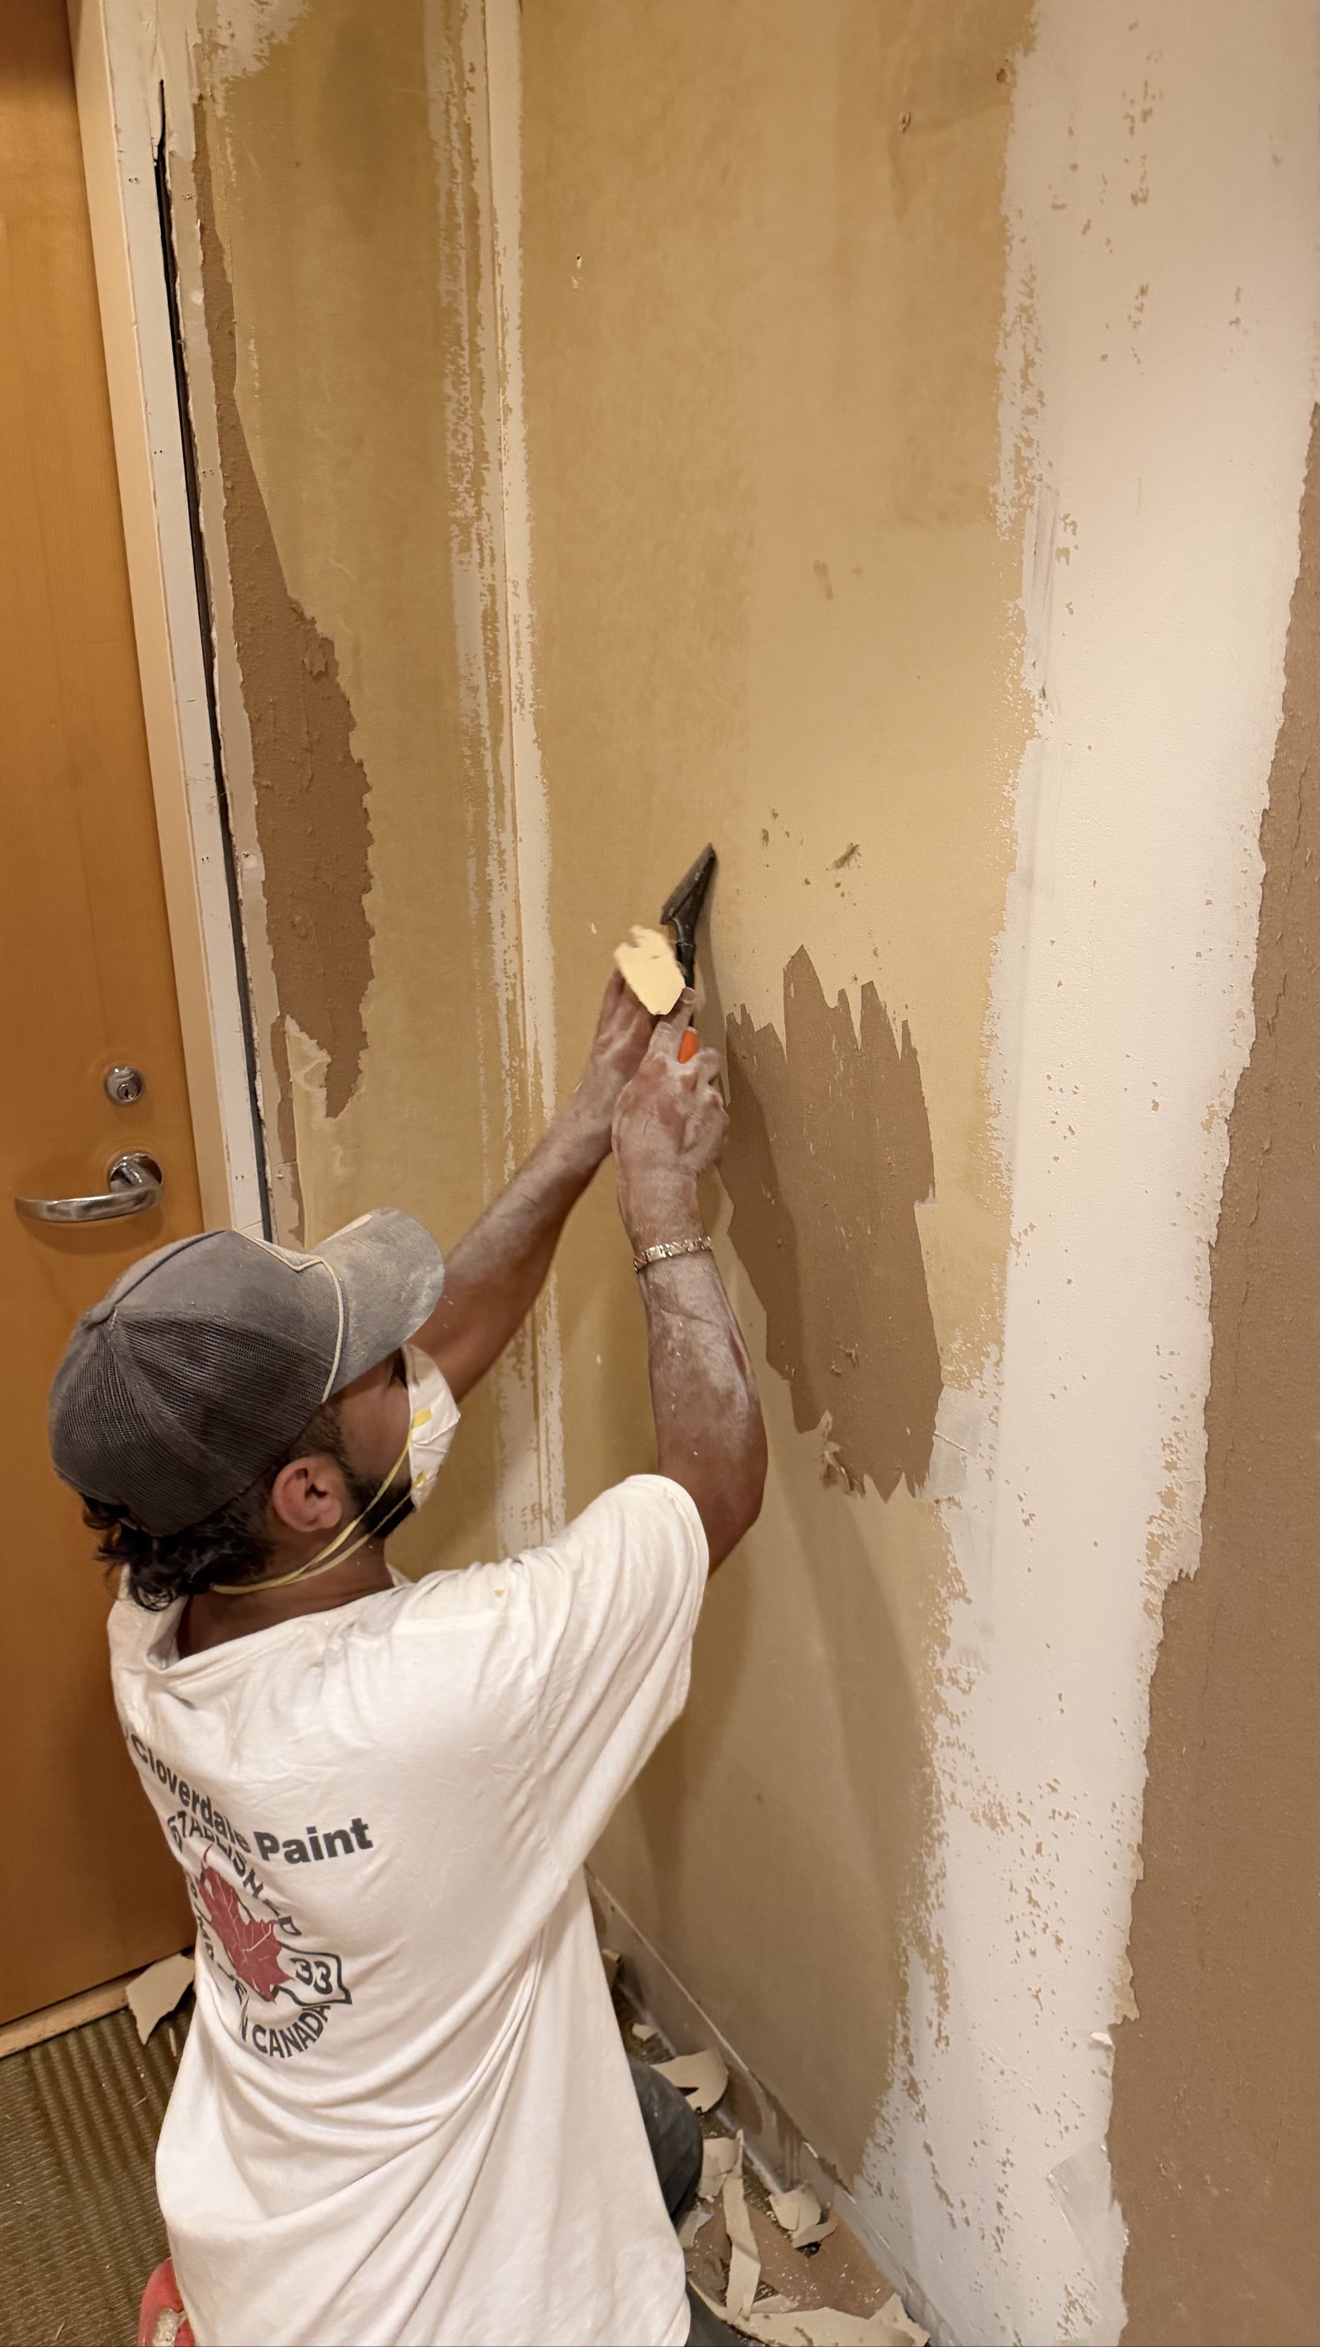
Our team started manually scraping away the remaining adhesive and damaged outer paper using hand tools.
At first, we hoped that removing the uppermost layer would be sufficient.
It wasn’t.
We discovered that the instability extended through multiple layers of the drywall paper.
To reach a stable surface, we had to continue carefully removing the compromised material.
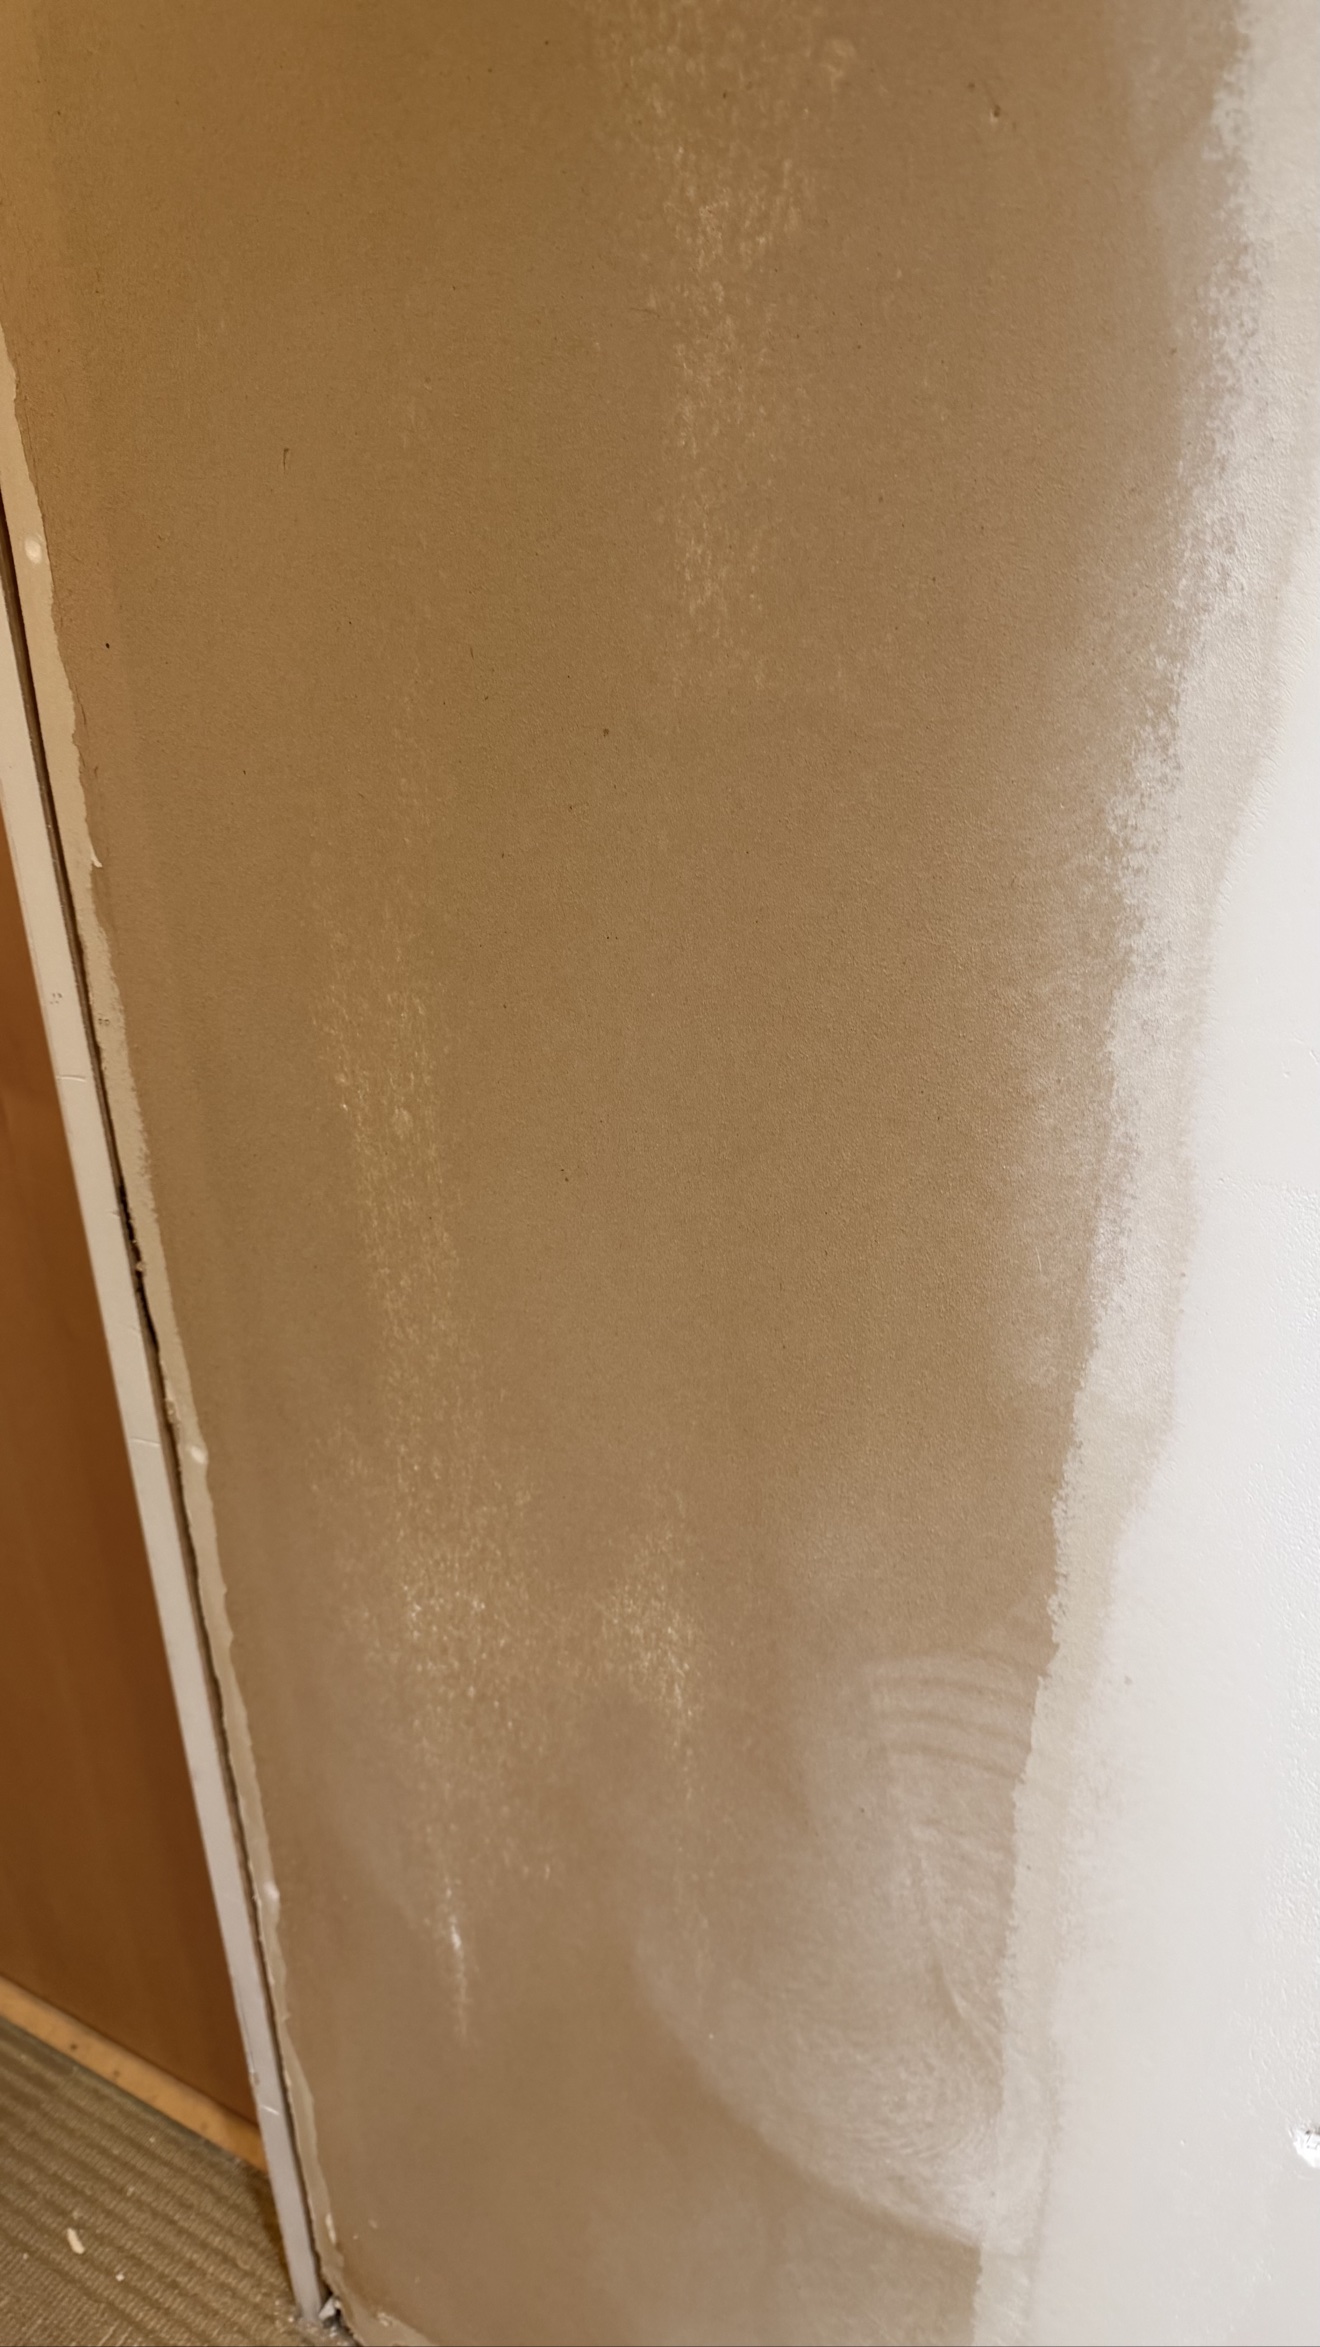
In some areas, we stripped away nearly the entire outer paper facing, working extremely close to the white gypsum core.
This was painstaking work.
Imagine having to manually remove layers of drywall paper across extensive sections of a high-rise building before even beginning the normal skim-coating process.
But we finally found something that worked.
Once the compromised layers had been removed and the remaining substrate was properly prepared and primed, we could apply skim coat without experiencing the same widespread bubbling.
The surfaces could then be rebuilt through successive finishing applications, sanding, and final priming.
For the first time, we had a reliable solution.
However, it came with a major disadvantage: labour.
The amount of manual scraping required was enormous.
After working through approximately five floors, we realized that continuing with this method across the entire 40-floor project would demand a tremendous amount of additional time and resources.
We needed another option.
An Unexpected Conversation With an Experienced Contractor
Sometimes, the best technical advice comes from someone who has already encountered the same problem.
During the renovation, I attended a gathering with other construction contractors.
I started talking about the challenges we were facing at Bayshore, particularly the severe drywall bubbling that occurred despite multiple primer applications.
An experienced contractor listened to my story and told me he had encountered a very similar problem during a hotel renovation.
Naturally, I asked him how he had solved it.
His recommendation was to try a fibre-reinforced concrete fill compound as the initial skim coat, followed by two additional finishing skim coats.
It was a different approach from the conventional drywall compounds we had been using.
Given the scale of our project and the time already invested in manual surface removal, we decided to test it.
And to our surprise, it worked.
Solution Two: Fibre-Reinforced Concrete Fill
The concrete fill method behaved differently from the conventional skim-coating products we had previously tested.
Interestingly, the existing drywall paper could still develop bubbles during the initial application.
However, the fibre-reinforced material hardened into a much more stable base.
In the areas we tested, the affected spots became firm rather than remaining soft and unstable beneath the surface.
This allowed our team to proceed with additional finishing coats.
Our tested process involved:
- Preparing and cleaning the existing wall surface.
- Applying the fibre-reinforced concrete fill compound as the initial base coat.
- Allowing the material to harden sufficiently.
- Applying a second skim coat using finishing compound.
- Applying a third finishing coat where required.
- Sanding and preparing the completed surface for final priming and wallpaper installation.
The result was a smooth, stable finish that met the project’s requirements.
This was a significant breakthrough.
We now had two methods that produced successful results under the conditions we encountered.
The first required removing the damaged drywall paper almost to the gypsum core.
The second used a fibre-reinforced base compound followed by finishing coats.
Both approaches required substantial work, but both allowed us to move forward.
Technical note: These methods describe project-specific results, not universal repair specifications. Severely damaged drywall, exposed gypsum, or compromised paper facings require careful evaluation. Product compatibility, adhesion, manufacturer instructions, and applicable building or fire-safety requirements must be considered before using any repair system.
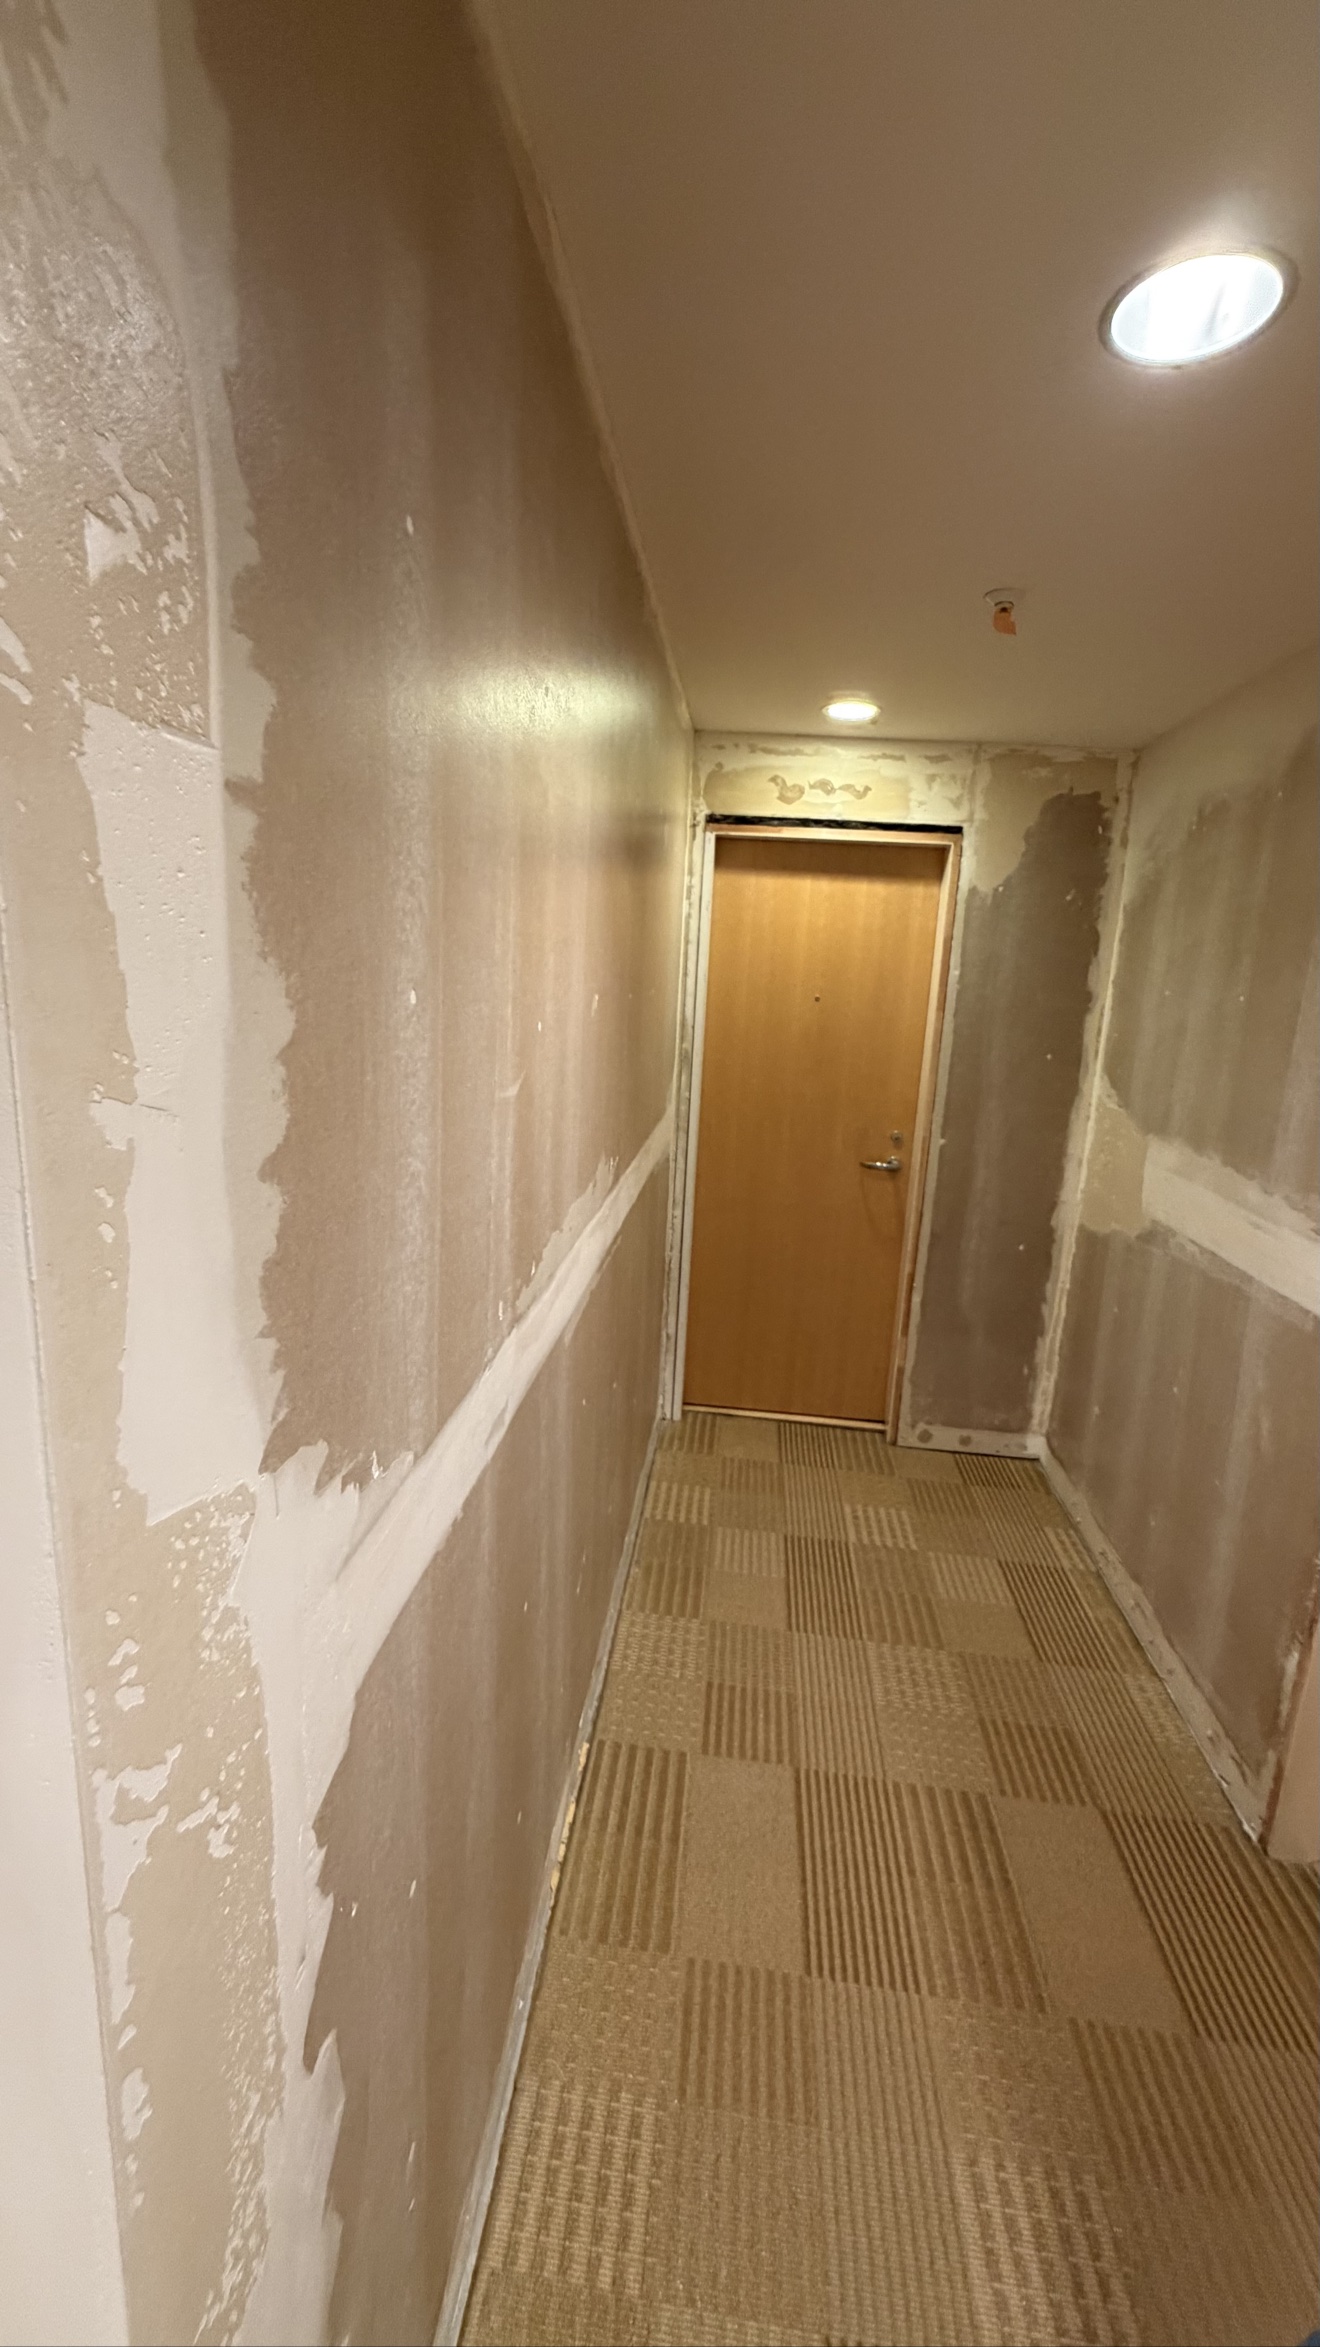
Comparing the Two Methods: Labour Versus Material Costs
One of the most interesting discoveries was that the two successful methods had surprisingly similar overall costs.
Method One: Extensive Drywall Paper Removal
This approach required significantly more manual labour.
Our team had to scrape away compromised drywall paper, prepare the exposed substrate, apply primer, and rebuild the wall surface with skim coats.
Material consumption was comparatively lower, but labour requirements were extremely high.
Method Two: Fibre-Reinforced Concrete Fill
This method reduced some of the extensive paper-removal work.
However, the additional material costs and multiple finishing applications increased the overall expense.
After comparing both approaches, we found that the total costs were nearly identical.
One method was more labour-intensive.
The other required more specialized material and finishing work.
The important point was that both approaches allowed us to achieve the quality required for the project.
Rather than choosing the cheapest shortcut, we focused on finding a dependable solution.
Why Documentation Made All the Difference
One of the most important parts of this project had nothing to do with sanding, priming, or skim coating.
It was documentation.
From the moment we realized that the drywall was reacting unexpectedly, we began documenting the conditions and the steps we were taking to resolve them.
We prepared a detailed report that included:
- The condition of the walls after wallpaper removal.
- The extensive bubbling observed during skim coating.
- The primers and preparation methods tested.
- The results of the unsuccessful applications.
- The alternative restoration methods we investigated.
- The additional labour and material requirements.
- The solutions that ultimately produced acceptable results.
This documentation became essential when discussing the unexpected scope of work with the company that hired us.
Our original estimate had been based on a conventional wallpaper removal and preparation process.
What we encountered was a substantially more complicated restoration issue that only became apparent after the existing wallpaper was removed and preparation began.
The additional work affected both the schedule and the project cost.
Because we had documented the problem and our testing process, we were able to explain exactly why the original approach was no longer suitable.
The company that hired us reviewed the situation, understood the unexpected conditions, and supported our proposed approach.
That cooperation made a major difference.
Instead of allowing an unforeseen technical issue to become a dispute, we worked together to find a practical way forward.
Clear communication, transparent reporting, and documented testing helped protect the project and maintain trust between everyone involved.
The Final Result: 40 Floors Successfully Completed
Despite the unexpected challenges, our team successfully completed the wall preparation work across all 40 floors.
The walls, unit doors, elevator doors and ceilings were included in the overall renovation scope.
The surfaces were prepared to the required standard, and the completed work received positive feedback.
What initially appeared to be a straightforward commercial wallpaper removal project became a demanding lesson in drywall restoration, product compatibility, surface preparation, and large-scale construction management.
We tested five different primers.
We experienced severe bubbling across extensive wall surfaces.
We manually removed compromised drywall paper almost down to the gypsum core.
We discovered and tested an alternative fibre-reinforced concrete fill method.
And ultimately, we delivered the results the project required.
The experience reinforced an important principle that guides our work at Exceptional Painting:
A professional contractor isn’t defined only by how well things go when everything is easy. True experience shows when unexpected problems arise and the team knows how to find a solution.
What Property Managers and General Contractors Can Learn From This Project
Commercial and strata renovations often involve existing materials that have been in place for many years.
Wallpaper adhesives, drywall paper, previous coatings, moisture exposure, and earlier repairs can all affect the condition of the substrate.
Some issues cannot be fully identified during an initial walkthrough.
Our Bayshore experience offers several valuable lessons.
- Always Evaluate Existing Wall Conditions
Before beginning large-scale wallpaper removal or skim coating, test representative sections of the existing surfaces.A small test area may reveal problems that could otherwise affect an entire building. - Don’t Assume a Primer Will Fix Every Problem
Even high-quality professional primers have limitations.The condition of the underlying material is just as important as the product being applied. - Document Unexpected Conditions
Photographs, reports, product records, and test results are essential when unexpected restoration work becomes necessary.They help property managers, general contractors, and subcontractors make informed decisions. - Be Prepared to Adapt
Construction experience isn’t just about following a familiar process.Sometimes the original method simply doesn’t work, and the right decision is to investigate alternatives. - Never Compromise on Surface Preparation
A beautiful finished wall depends on what is underneath it.Skipping proper preparation can create failures that become much more expensive to repair later.
Professional Commercial, Strata and High-Rise Renovation Services in Vancouver
At Exceptional Painting Inc., we specialize in professional painting, drywall preparation, wallpaper removal, skim coating, and finishing services throughout Greater Vancouver and the Lower Mainland.
Our experience includes:
- Commercial painting and renovation projects.
- Strata and multi-unit residential buildings.
- High-rise wall preparation and finishing.
- Hotel and hospitality renovations.
- Wallpaper removal and surface restoration.
- Drywall repairs and full skim coating.
- Professional sanding and dust-management systems.
- Interior and exterior painting.
We understand that large-scale renovations require more than skilled tradespeople.
They require planning, communication, reliable scheduling, careful testing, and the ability to respond professionally when unexpected conditions arise.
Whether we’re preparing a single commercial unit or coordinating work across dozens of floors, our goal remains the same: deliver a high-quality result that our clients can depend on.
Planning a Commercial or Strata Renovation in Vancouver?
If you’re a property manager, strata council, general contractor, or building owner planning a painting or renovation project, we’d be happy to discuss your requirements.
From wallpaper removal and drywall restoration to complete commercial painting and finishing, Exceptional Painting brings practical experience and a commitment to quality to every project.
Contact Exceptional Painting Inc. for a professional estimate.
Phone: (236) 995-6777
Email: nvpaintings@gmail.com
Website: https://exceptionalpaintings.ca
Service Area: Vancouver, Burnaby, Surrey, Richmond, North Vancouver, West Vancouver and surrounding Lower Mainland communities.
Exceptional Painting Inc.
Quality You Can See. Results You Can Trust.