

Walk into almost any home in Metro Vancouver that is more than fifteen years old and you will find the same story on the walls. A few nail holes from old picture frames. A hairline crack running down from a door frame. Maybe a soft spot near a window where condensation has been doing quiet damage for years. None of it looks dramatic. All of it shows through fresh paint if you skip the repair step.
We repaint a lot of homes around Vancouver, Burnaby, Surrey and the North Shore, and drywall repair is part of nearly every interior job we do. Not because we are looking for extra work, because paint is honest. It does not hide anything. It actually makes every bump, ridge and unfilled hole more visible, especially once the light hits the wall at an angle. So before we talk about colours or finishes, we talk about the surface underneath.
The three kinds of damage we see most
Nail holes and screw pops. The small stuff. Old nails from shelves and artwork, and the little round bumps where drywall screws have worked their way out over time. Screw pops are very common in Vancouver because our houses move, temperature swings, settling, and the general flexing of wood framing through wet winters all push fasteners outward. These are quick to fix: fill, sand, spot prime.
Cracks. Hairline cracks above doors and windows, or along ceiling corners, are usually just the house settling and are nothing to lose sleep over. We open them slightly, fill them with a flexible compound, and they disappear. But a crack that keeps coming back after repair, or one that runs diagonally across a large section of wall, deserves a closer look before anyone paints over it. If the drywall is moving, paint will not hold it still.
Water damage. This is the one people underestimate. A slow leak under a bathroom, condensation pooling on a window sill, a roof flashing issue, drywall soaks it up like a sponge. Stained, swollen or soft drywall cannot just be painted over. Stains bleed through paint no matter how many coats you apply, and soft drywall keeps crumbling underneath. Sometimes a section needs to be cut out and replaced entirely. And the source of the water has to be fixed first, or you are just scheduling the same repair twice.
When patching is enough, and when the wall needs skim coating
Most walls just need spot patching. A dab of filler here, a filled crack there, a sanded screw pop. The wall is fundamentally flat and sound, and isolated repairs bring it back to a paint-ready surface.
Skim coating is a different job. That is when we spread a thin layer of joint compound across the entire wall to create a brand-new, uniform surface. We recommend it when a wall has heavy texture that the homeowner wants gone, when there are dozens of patches that would each flash differently, or when old wallpaper removal has chewed up the paper face of the drywall. It is more labour, but on the right wall it is the difference between a decent paint job and a flawless one.
A good rule of thumb: if you can count the problem spots on one hand, patching is enough. If you stop counting, ask about skim coating.
How we actually do the repair
Our process is the same on every job, whether it is one bedroom or a whole strata hallway:
- Fill. We use proper drywall compound, applied in thin layers. Thick blobs of filler shrink and crack as they dry, so two thin coats always beat one thick one.
- Dry. This is the step people want to skip, and the step you cannot skip. Compound needs to dry all the way through, not just skin over on top.
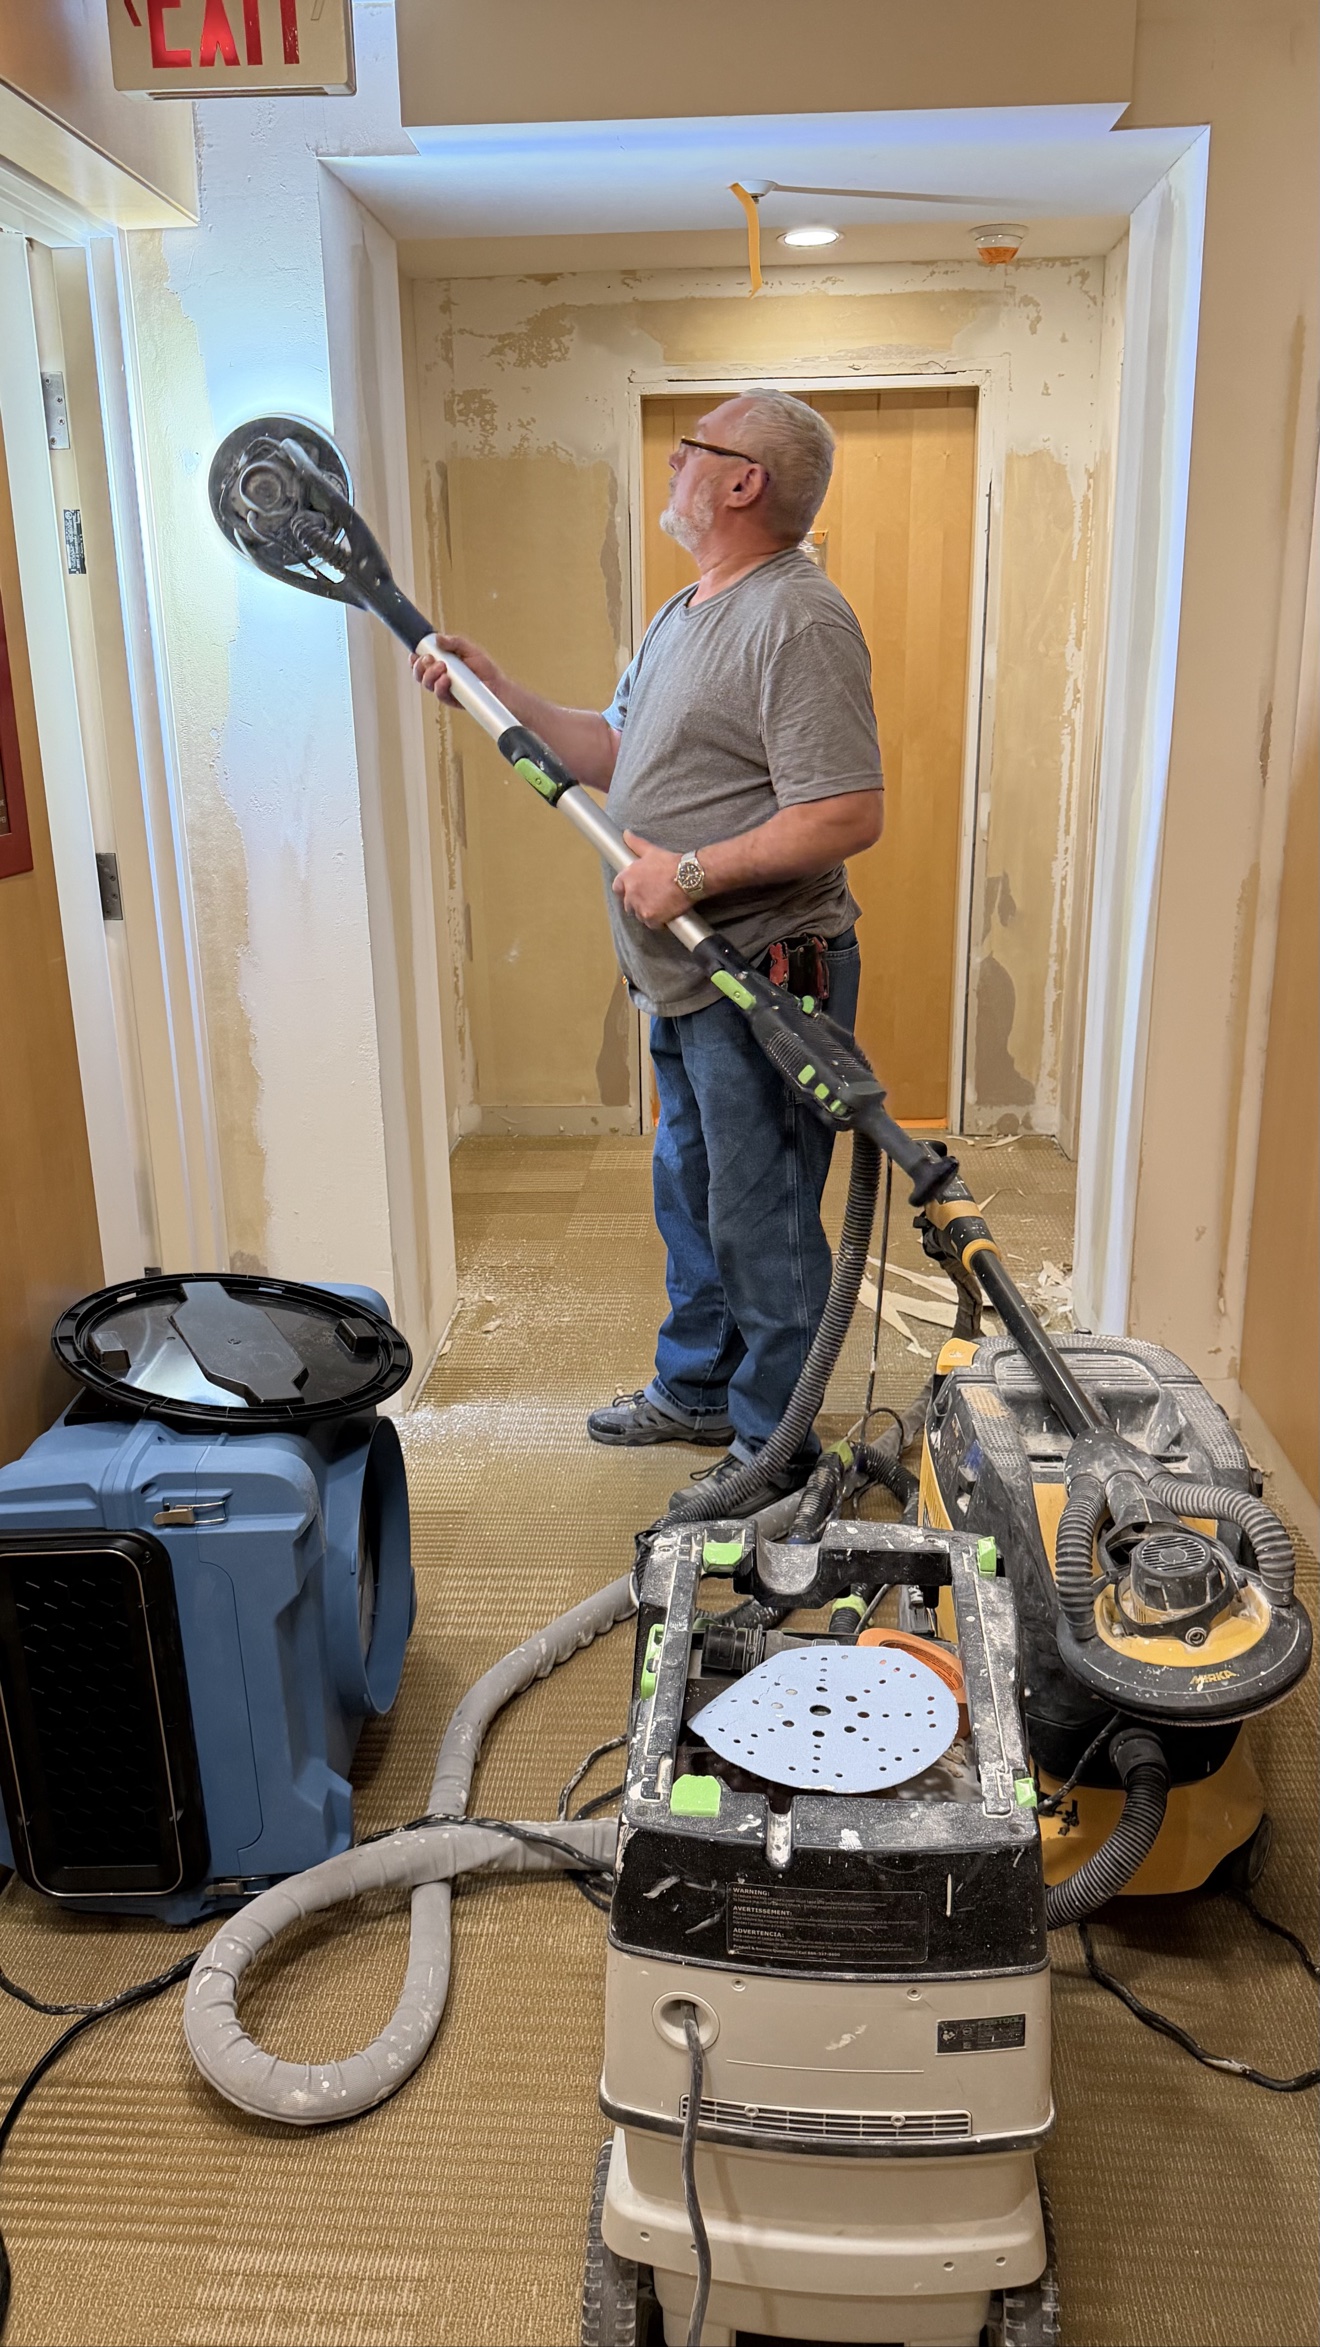
- Sand. We sand every patch smooth and feather the edges so the repair melts into the surrounding wall. We use Festool sanders with dust extraction, which means no cloud of white dust settling over the whole house. That is a bigger deal than it sounds when the family is still living there.
- Prime. Every patched spot gets primer. This is non-negotiable.
That last point deserves emphasis, because it is the most common shortcut we see. Bare drywall compound absorbs paint differently than the surrounding painted wall. If you roll paint straight over an unprimed patch, the patch drinks in the first coat and ends up looking dull and flat next to the rest of the wall. Painters call it flashing, and it is visible from across the room, especially with darker colours or in raking light. One coat of primer seals the patch so the topcoats go on evenly. It takes minutes and it is the difference between a repair you can find and one you cannot.
Drying times, and why Vancouver makes them longer
Drywall compound dries by evaporation, and evaporation is slower in damp air. Vancouver’s climate, rainy falls, humid winters, condos with the windows shut for months, means patches take longer to cure here than the label on the bucket suggests. A patch that feels dry to the touch in an hour may still be damp underneath.
We plan for this. We never sand or prime a patch the same hour it was filled, and on big skim-coat jobs we build the drying time into the schedule openly. Rushing this step is how you get patches that shrink back, crack, or flash through the paint a month later. If a painter tells you the whole repair-and-paint can happen in a single afternoon, ask how the compound is supposed to dry in that time.
Why prep shows up on your quote
Every so often a homeowner asks why the estimate includes a line for wall preparation when “the walls look fine.” Fair question, and the answer is simple: paint is only as good as the surface it sits on.
The cheap quote that skips prep is not actually cheaper. It is just a paint job with a shorter lifespan, and a disappointingly plain result.
A note for strata owners and landlords
In strata buildings and rental units, drywall damage has a way of accumulating between tenancies, picture hooks pulled out, furniture scuffs along hallways, and the wear of people moving in and out. It adds up.
The bottom line
Good paint over bad drywall is wasted money. The repair work is not exciting, nobody photographs it, but it is the reason the paint job looks good in year five as well as year one.
If your walls have seen better days and you are thinking about repainting, start with a walkthrough. We will look at the walls with you, tell you honestly what needs patching and what does not, and give you a clear quote, no pressure, no obligation.
Call Exceptional Painting at (236) 995-6777 to book your free walkthrough anywhere in Metro Vancouver.